OXIGEN salud
Mechanical ventilation
OXIGEN salud
Mechanical ventilation
Invasive mechanical ventilation (IMV) is a type of ventilatory support that uses a positive pressure mechanical ventilator to assist or replace the patient's breathing. It is performed through an artificial airway, such as a tracheostomy or endotracheal intubation.
In individuals with progressive neuromuscular diseases involving the bulbar region, and in those with other conditions where non-invasive access is ineffective, performing a tracheostomy is the only alternative for maintaining long-term ventilation.
The objectives of Home Mechanical Ventilation via Tracheostomy (HMV) are:
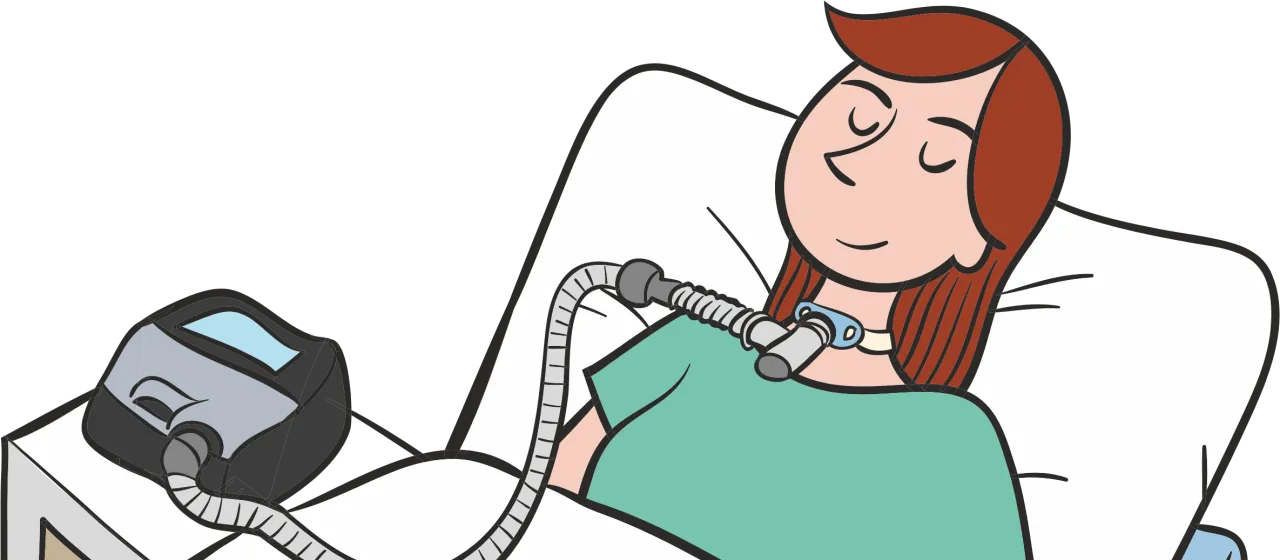
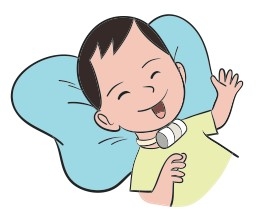
A tracheostomy is an artificial and invasive airway access device that can be maintained for an extended period. It allows not only for adequate ventilation but also direct access to respiratory secretions, preventing upper airway obstruction. It also allows for a face free from a nasal or facial mask and provides a more secure system when support is needed for 16 to 24 hours a day.
Disadvantages include: increased risk of infection, irritation around the tracheostomy, increased secretions at the beginning, greater care due to the mobilization and removal of secretions using mechanical cough and suction devices, as well as special attention to speech through the use of voice valves.
Tracheostomy tubes can be made of various materials (plastic or silicone), with or without a cuff, and with or without a fenestration. In both types, it is recommended that they have an easily removable inner cannula for cleaning, thus avoiding the need to remove the entire cannula in case of obstruction by a mucus plug.
Fenestrated cannulas are indicated for patients on part-time mechanical ventilation. In these cases, during periods without ventilation, the fenestrated inner cannula is inserted, the cuff (if present) is deflated, and a plug or filter is placed over the cannula opening. This allows the patient to speak. Mechanical ventilation with uncuffed cannulas will be attempted whenever the degree of bulbar involvement and the patient's characteristics permit.
Ventilation without a cuff is, by definition, leaky. The use of cuffless cannulas can facilitate phonation in patients with 24-hour VMTD if they maintain proper bulbar function.
In cases where ventilation through a non-cuffed cannula is ineffective or leaks into the upper airway cause significant discomfort to the patient, the following alternatives are proposed: switching to a cannula with a larger diameter, ventilation through a cannula with a deflated cuff, or, as a last resort, ventilation with a cannula with a partially or fully inflated cuff.
Volume-controlled or pressure-controlled ventilators can be used. It is important to note that, if a pressure-controlled mode is used, excessive leaks can interfere with cycling.
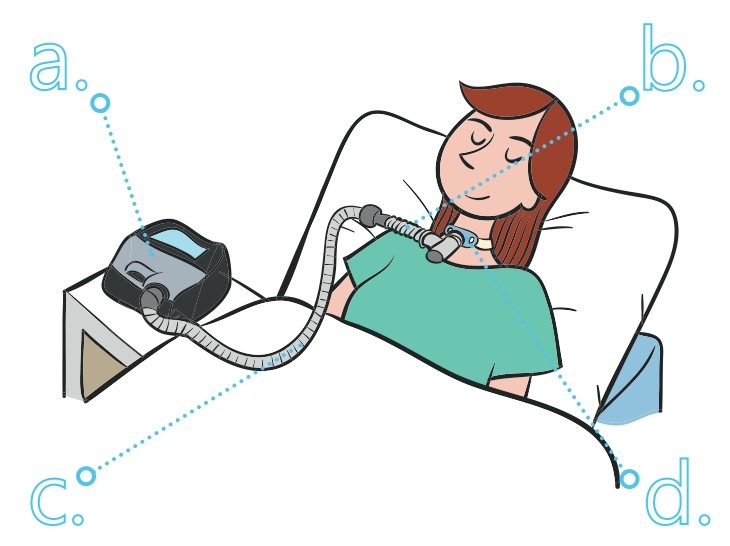
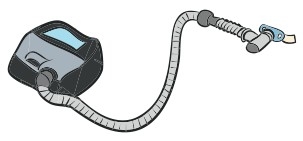
To carry out invasive mechanical ventilation treatment, the following is necessary:
a. The ventilator, which generates airflow at a specific pressure.
b. The heat and humidity exchanger, which ensures the patient maintains an adequate level of these two elements.
c. The tubing, the piece that connects the ventilator to the patient.
d. An interface (the tracheostomy cannula) that connects the patient to the ventilator. Different types of tracheostomy cannulas are available to achieve the best fit with the ventilator.
Place the ventilator on a bedside table, near the headboard, so that it cannot fall over during sleep.
Make sure you do not place the machine somewhere where someone might bump into it or trip on its power cable.
Ensure the area around the machine is clean and dry.
The machine should be positioned so that nothing is obstructing the air inlet at the back of the ventilator. Connect one end of the power cable to the ventilator and plug the other into the mains.
A light will come on to indicate that the ventilator is plugged in.* Connect the tubing to the tracheostomy cannula and the humidifier if this has been prescribed.
* This depends on the model of the machine. Check the instruction manual.
Remember that the cannula must be cared for properly to ensure that the airway stays permeable and the tracheostomy cannula does not come out, and to prevent complications (especially respiratory infections).
Tracheostomy cannulas are made up of inner and outer tubes. The outer tube or cannula is equipped with ties, which wrap around the patient’s neck. The inner tube or cannula is found inside the outer cannula and can be removed for cleaning.
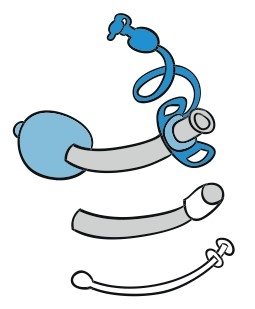
The tracheostomy cannulas may be equipped with a balloon, which fixes the tube in place and seals the airway to prevent air leaks.
Connect one end of the tubing to the ventilator and the other to the connector on the tracheostomy cannula.
Turn the machine on and breathe normally.
Adjust the tubing so that it is comfortable for the patient and they can move freely.
When the patient is not connected to the ventilator, the tracheostomy humidifier can continue to be used to maintain a suitable level of moisture in the airway.
This procedure is not risk-free and its complications can arise in the short or long term.
Correctly treating tracheostomy, from taking care of the stoma to secretion suctioning is paramount to avoid them.
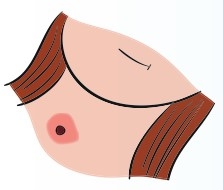
This means keeping the stoma clean once the cannula has been removed, cleaning the mucous and the skin with a sterile gauze, a saline solution or an antiseptic such as povidone-iodine. Let dry. Periodically check the stoma for reddening, signs of infection, bleeding...
Apply a light layer of antacid solution (almagate, antacid or other products available) on irritated areas.
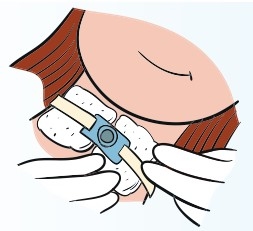
Once the stoma is clean, place the cannula again. Place clean gauzes or bibs between the patient’s skin and the cannula to get rid of the humidity of secretions and help keep the area clean and dry for as long as possible.

Shall we call you?